By Elizabeth Barr
@elizabethbarr
I love a good DIY project. I am that girl who you will find scrolling through the black-hole that is Pinterest, at 2 am thinking about how it would be much easier (and cheaper – lets be real here), to make my own tufted headboard or a marble and wood cheese platter.
My phone is filled with photos of recipes, flower arrangements and home décor that I am waiting for the weekend to try. Which is one of the many reasons why I am obsessed with the holidays. The traditions, the red-cup eggnog lattes and of course all the many DIY projects.
There is just something magical about a wreath hung on the front door. Its welcoming, festive and believe it or not, very easy to make! To kick off the holiday season, here is a DIY that will make your home holiday-ready in under an hour. I hope you are as obsessed with yours as much as I am!
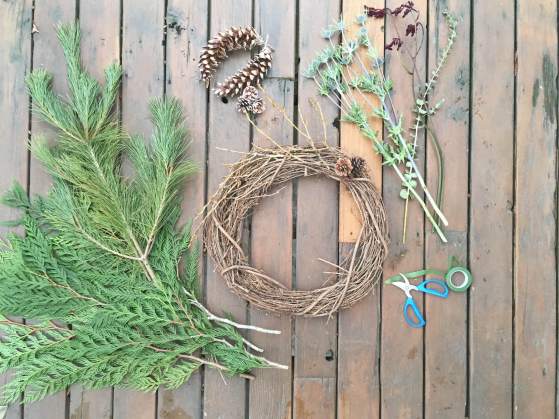
What you’ll need
- Grapevine wreath base
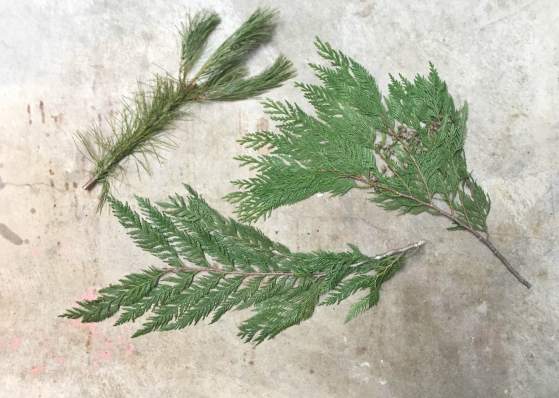
- Cedar
- Pine
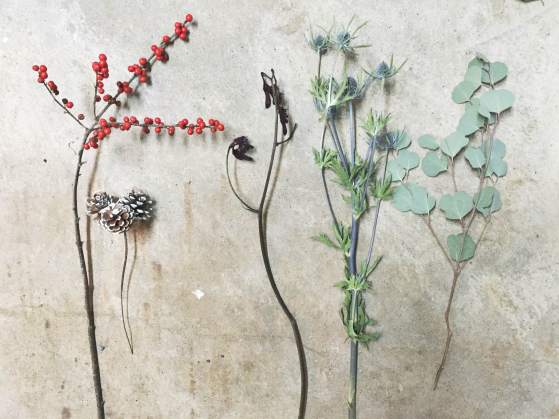
- Any type of Filler Flowers – Eucalyptus, English Thistle or pinecones, really anything that you want.
- Scissors
- Florist Wire
All of these you can pick up from any flower shop. I personally love going to Granville Island – they have a great selection and while you’re there you can pick up the rest of your Christmas shopping
Step 1 : For the wreath, you can choose to either purchase a pre-made wreath (like I did) or make your own. I have made wreaths using both, and I can honestly say that the pre-made wreaths at Michaels are reasonably priced and create the same look as if you created your own – without all the extra time!
Step 2: Once your wreath is complete, start preparing your plants by separating them into two categories. In the first pile are all the heavy, leafy greenery, which in this case is all of the Pine and Evergreen branches. After, group together all of your decorative floral pieces. These are the pretty filler stems such as eucalyptus and English thistle. This will make it easier when you are deciding what pieces to put where
I found that it is easier to start by hanging your wreath on your door, so that you can see where each branch is going to fall.
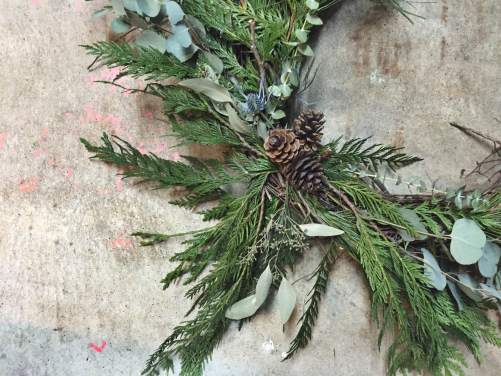
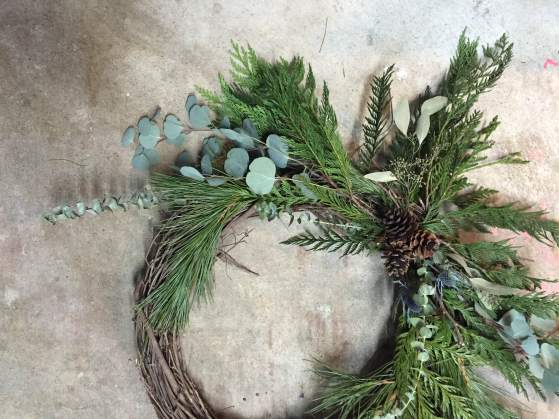
Step 3: Start by creating your outer edges and working in towards your center. All you have to do is cut the pieces or greens and tuck them into the grapevine base. Place your heavy branches in the wreath at the angle that you want them to fall. As you can see, the grapevine branch is twisted and the branches will hold without too much effort. Now, how’s that for easy? You can create whatever style you like with the branches. Personally, I love asymmetry. I like to leave the branches tucked in just enough that they wont fall out and let them fall naturally.
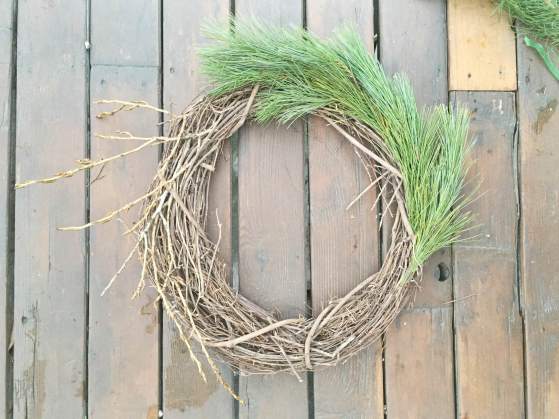
I love leaving a part of the wreath exposed as it creates a natural and wild look.
Step 4: After you build your base, simply tuck in your accent flowers in any empty spaces. Remember to use them as an accent, they are there to add to the wreath, not take away from it.
Now, step back and admire your beautiful work. Hang it on your front door and get ready for all the compliments.

Elizabeth is a planner for Sweetheart Events, a calligrapher and a lover of all things caffeinated and creative.